Writing
Timeline & Canvas
Scene cards on a corkboard over a timeline of the story's pages — arrange and plan.
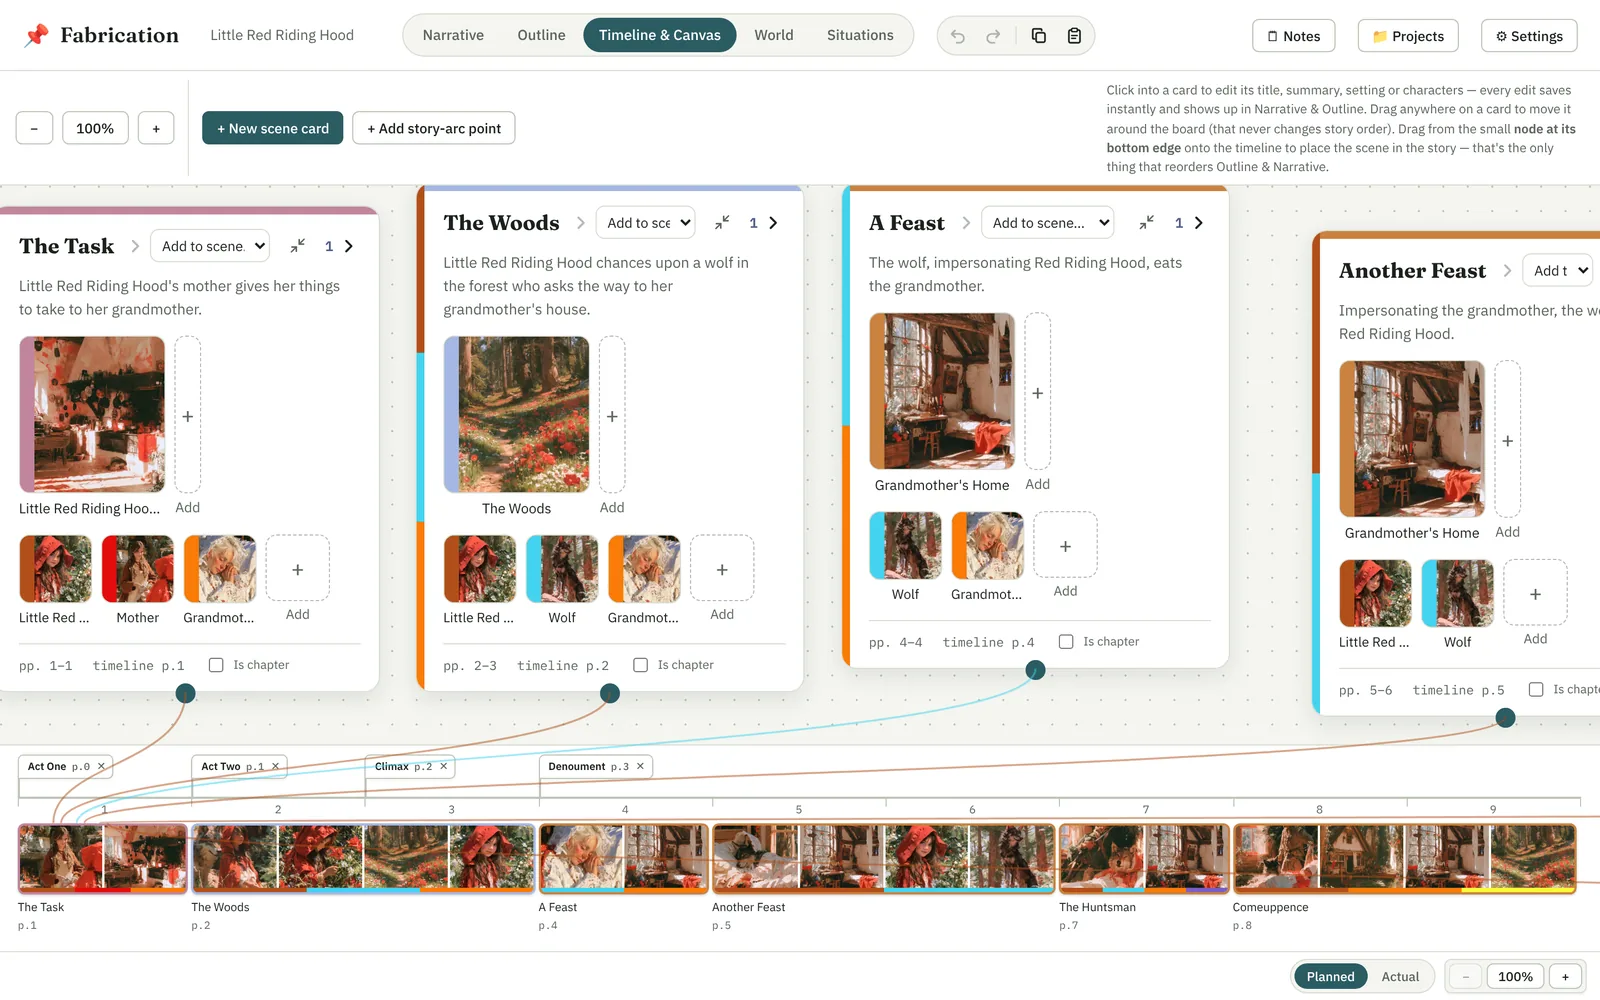
Timeline & Canvas has two parts: a corkboard of scene cards you can arrange freely, and beneath it the timeline — the story's pages, from the first to its target length, with each scene placed on it.
The corkboard
- + New scene card adds a scene. Click into a card to edit its title, summary, settings or characters.
- Drag cards anywhere; the arrangement is yours and doesn't change the story's order.
- Drag a card down from the node on its bottom edge onto the timeline to put the scene in the story.
- Minimize a card to just its main picture and title, or maximize it; Fabrication remembers.
- Zoom out to see the whole board, or in to work on a card, with the − and + buttons; scroll to move around.
Inside a scene
The count and arrow in a card's header open it onto what's in the scene: its settings and characters as cards, to arrange. + Add… puts another element in the scene, and +N from the scene brings in what's been added to it since. Draw from a card's ● to another card to connect them; click the arrow to name it or remove it. Click a card for its details, and to take it out. It's the same In this scene on the Situations tab and beside the Narrative.
The timeline
The timeline spans your project's target length (set in Settings), or further once the writing runs longer. Each scene is a tile showing its pictures — its illustrations first, then its settings and characters — with its characters' colours along the bottom.